
During last night’s Taste of Leucadia, I happened to walk up to Wipeout Coffee and sample some ice coffee. Mmmmm, delicious! I recommend you make your way to Just Peachy in Leucadia or Seaside Market in Cardiff to find yourself some amazing organic espresso and coffee.


Ansel Adams Quote
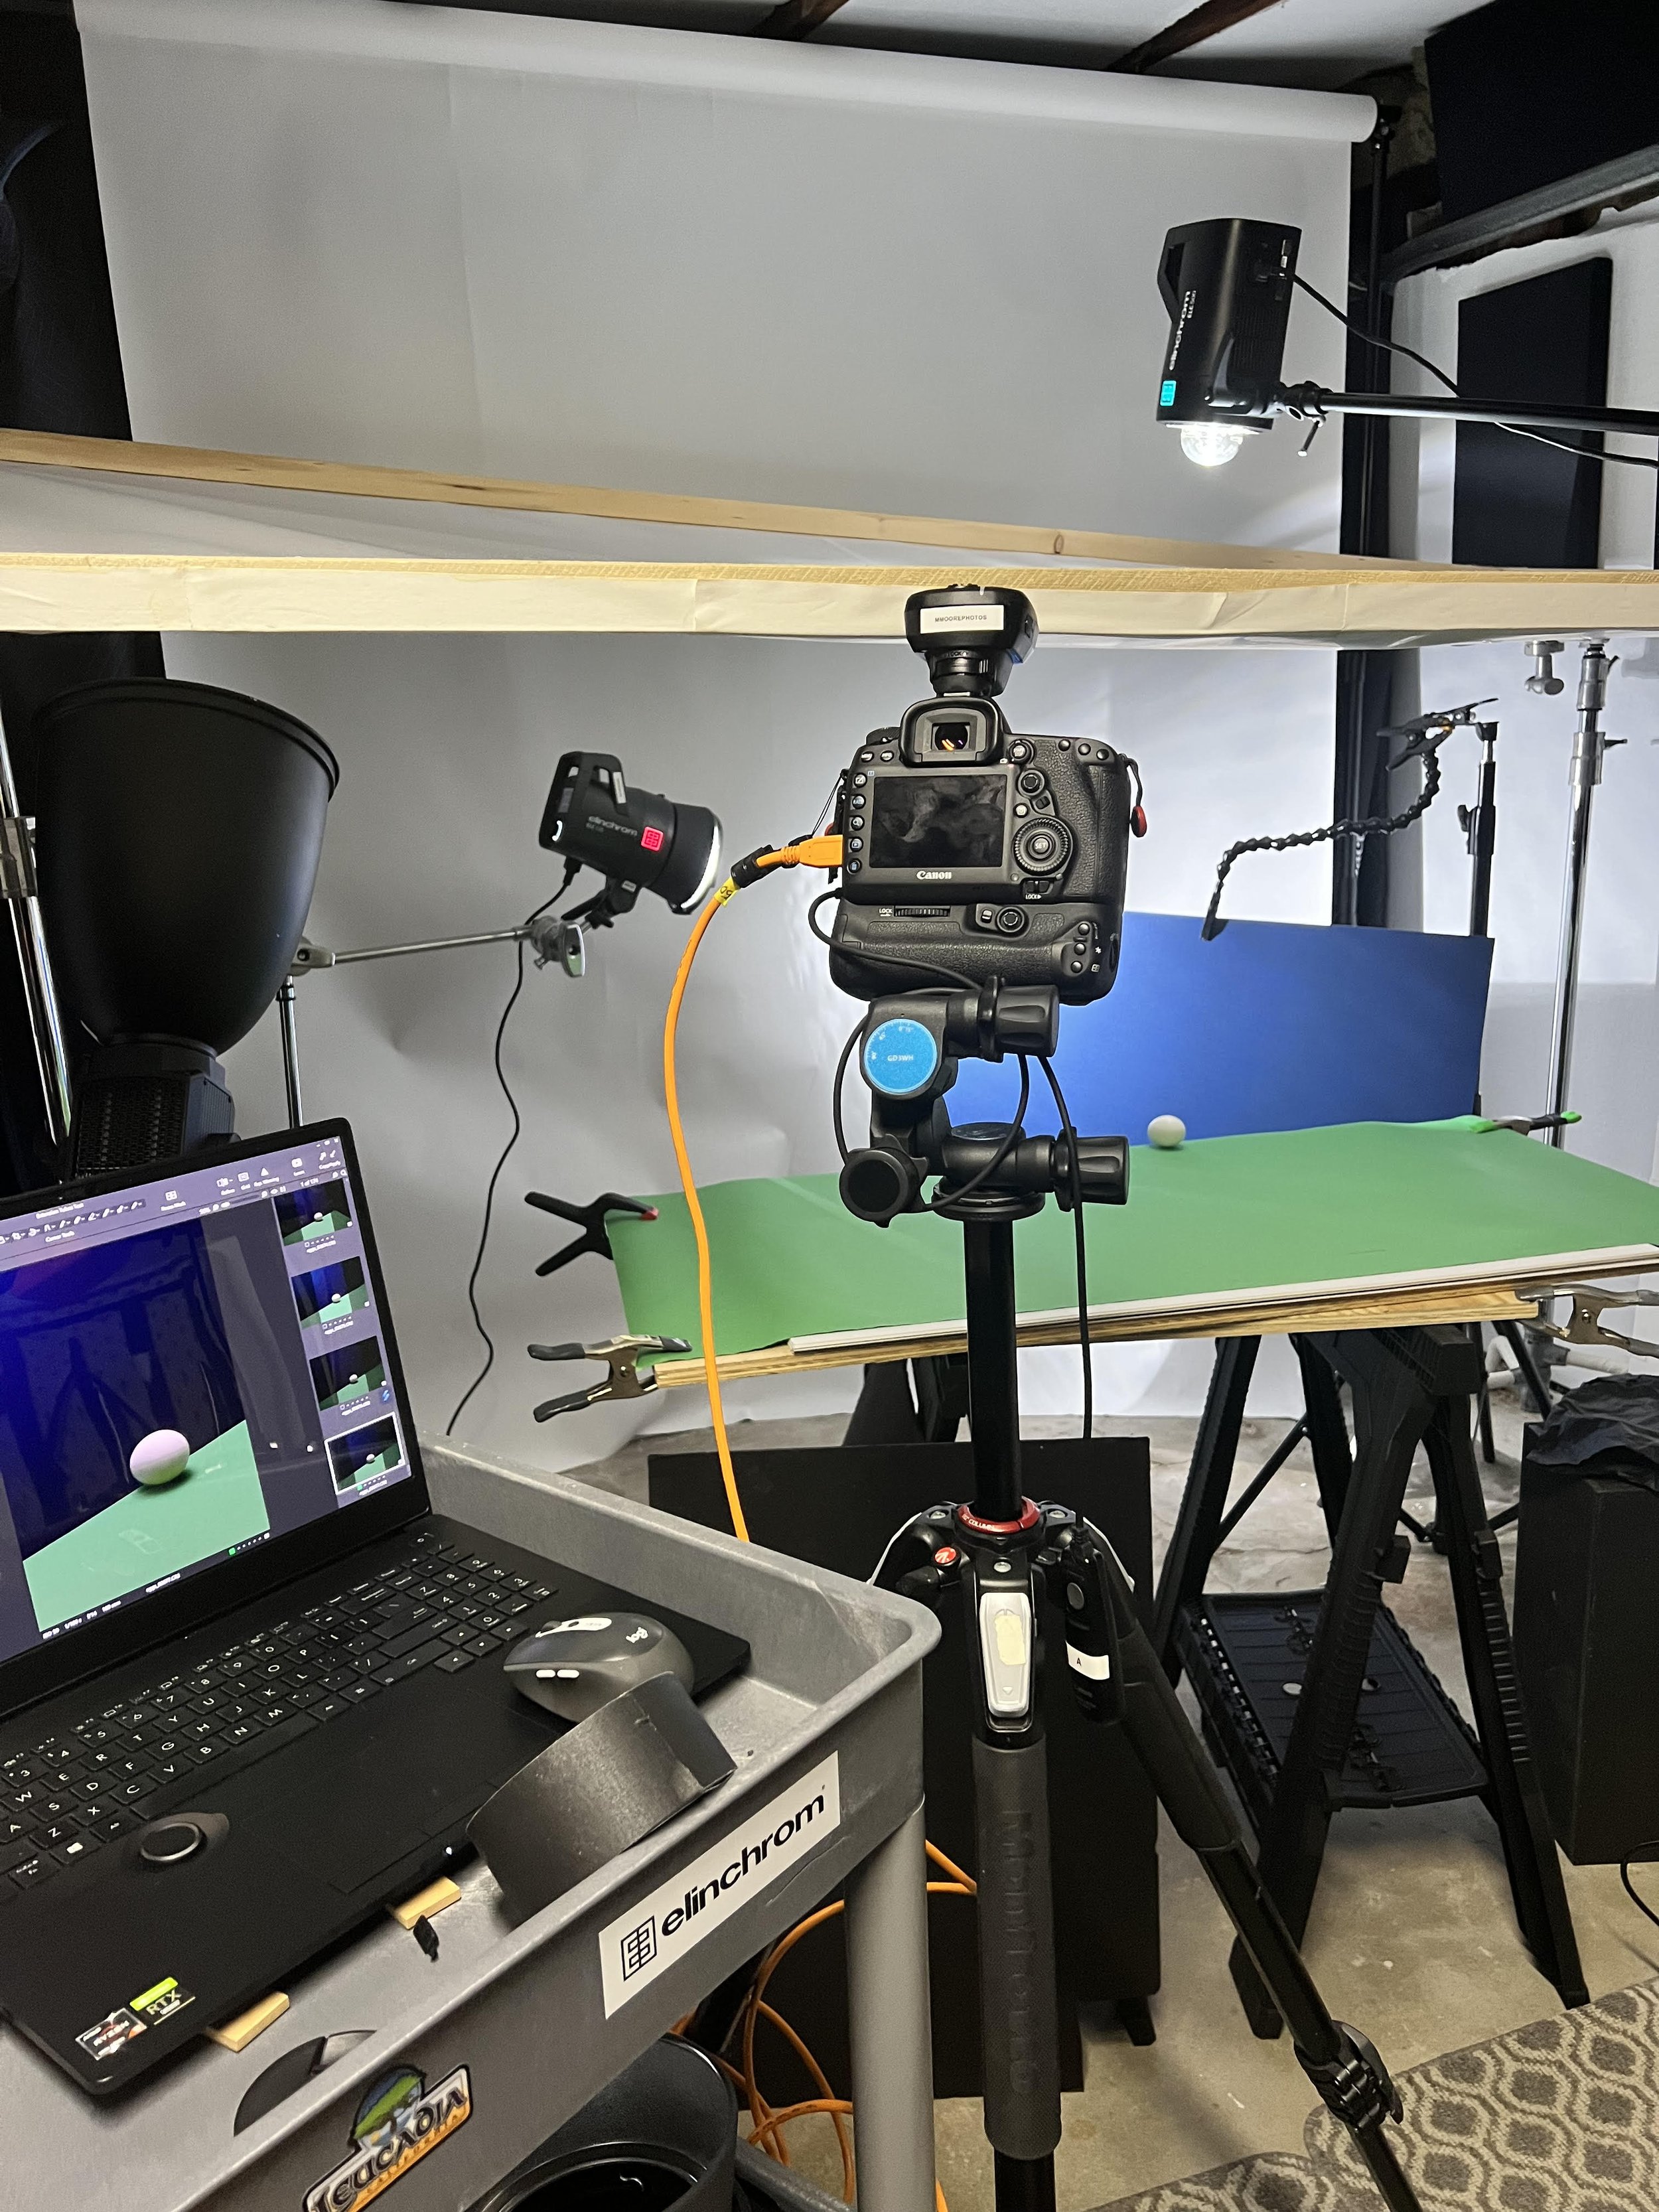
One Egg
A simple setup with one white egg, two lights and lots of patience.
I included the BTS for those who are interested.


CGI or Professional Photography?
CGI vs. Professional Photography: Which Should Your Company Use?
In today's visually-driven world, companies need high-quality imagery to make an impact on their audience. But with so many options available, it can be difficult to decide which route to take. Should you use CGI or a professional photographer? Both options have their advantages and disadvantages, so it's important to consider your company's specific needs before making a decision.
What is CGI?
CGI, or computer-generated imagery, is a type of digital art that uses computer graphics to create images, animations, and special effects. It is often used in movies, video games, and advertising to create realistic-looking visuals that would be difficult or impossible to capture in real life.
Advantages of CGI
One of the main advantages of CGI is its versatility. With CGI, you can create any type of image you can imagine, from fantastical landscapes to futuristic technology. This flexibility allows you to showcase your products or services in unique and compelling ways that might not be possible with traditional photography.
Another advantage of CGI is its consistency. With traditional photography, lighting, weather, and other factors can greatly affect the final image. CGI, on the other hand, allows you to create images with a consistent look and feel, regardless of external factors.
Disadvantages of CGI
One of the main disadvantages of CGI is the cost. CGI can be quite expensive, especially if you need to create complex images or animations. This cost can be prohibitive for smaller companies with limited budgets.
Another disadvantage of CGI is that it can sometimes look artificial or fake. While CGI has come a long way in recent years, it can still be difficult to create images that look completely realistic. This can be a drawback if you are trying to create images that are meant to be authentic and relatable.
What is Professional Photography?
Professional photography is the art of capturing images using a camera. It is often used in advertising, marketing, and other industries to create images that showcase products, services, or locations in the best possible light.
Advantages of Professional Photography
One of the main advantages of professional photography is its authenticity. Professional photographers are skilled at capturing images that are true-to-life and convey a sense of authenticity and emotion. This can be especially important if you are trying to build a connection with your audience.
Another advantage of professional photography is its cost. While professional photography can be expensive, it is often more affordable than CGI. This can be a significant advantage for smaller companies with limited budgets.
Disadvantages of Professional Photography
One of the main disadvantages of professional photography is its limitations. Professional photography is limited by the laws of physics and the environment in which the images are taken. This means that it may be difficult or impossible to capture certain types of images or to create images with a consistent look and feel.
Another disadvantage of professional photography is its variability. With professional photography, the final image is affected by many external factors, such as lighting, weather, and the subject being photographed. This means that it can be difficult to create images with a consistent look and feel.
Which Should Your Company Use?
When deciding whether to use CGI or professional photography, there is no one-size-fits-all answer. The best option for your company will depend on your specific needs and budget.
If you need to create images that are unique, futuristic, or that would be difficult to capture in real life, CGI may be the best option. However, if you are trying to create images that are authentic, emotional, or that showcase real-life products or locations, professional photography may be the better choice.
If you need professional photography for your product, contact me at info@mmoorephotos.com.
This post was written with the help of Chat GPT.
What is the Inverse Square Law?
What is the inverse square law in photography?
The inverse square law is a principle in physics that applies to many different fields, including photography. In photography, the inverse square law states that the intensity of light decreases in proportion to the square of the distance from the source of light.
In other words, if you move your subject twice as far away from your light source, the intensity of light on your subject will decrease by a factor of four. This means that you'll need to increase your exposure by two stops to compensate for the decrease in light.
The inverse square law is important to understand in photography because it can affect the way you position your lights and how you expose your images. By understanding how light falls off over distance, you can create more balanced and pleasing lighting in your photographs.
Here’s a great example.
Let's say you're using a flash to light a subject, and the flash is positioned one meter (approximately three feet) away from the subject. According to the inverse square law, if you move the flash back two meters (approximately six feet), the intensity of light on the subject will decrease to one-fourth of its original value (since 2 squared is 4).
To compensate for this decrease in light intensity, you'll need to increase your exposure by two stops. This means that if your original exposure was f/8 at 1/125th of a second, you'll need to adjust it to f/4 at 1/125th of a second to get the same level of exposure on the subject.
By understanding the inverse square law, you can make more informed decisions about the placement of your lights and how you set your camera's exposure settings to achieve the desired lighting effect on your subject.
More to come on this subject so stayed tune…

Why Should My Business Use a Professional Photographer?
Professional photography can increase sales in small businesses in several ways:
Better visual representation: High-quality photos capture the attention of potential customers and can entice them to learn more about your business. Professional photography can help showcase your products or services in the best possible way, making them more appealing to potential customers.
Brand image: Professional photography can help create a consistent and professional brand image for your business. This can make your business appear more trustworthy and credible, which can help increase customer loyalty and repeat business.
Social media engagement: With the rise of social media, having visually appealing content is more important than ever. High-quality photos can help increase engagement on social media platforms like Instagram and Facebook, which can lead to more exposure and ultimately more sales.
Website optimization: Professional photography can also improve the overall look and feel of your website, which can lead to better user engagement and ultimately more sales. High-quality photos can also help improve your website's search engine optimization (SEO), making it easier for potential customers to find your business online.
Overall, professional photography can help small businesses stand out in a crowded marketplace and ultimately increase sales by improving the visual representation of their products or services, creating a consistent brand image, increasing social media engagement, and optimizing their website.
Contact me today at info@mmoorephotos.com, and I will help solve your photography needs immediately.
How to Make Better Product & Still Life Photographs / San Diego Product Photographer
Here are some tips for taking better product photography images:
Choose the right lighting: Good lighting is crucial for product photography. You can use natural light, but if that’s not possible, consider investing in a lighting kit or softbox. Avoid using harsh overhead lighting as it can cast unflattering shadows.
Use a tripod: A tripod helps to keep your camera steady and ensures that your images are sharp and in focus.
Select the right background: Choose a background that is clean and uncluttered, and complements the product you’re photographing. You can use a white or black background, or opt for a colored background that enhances the product. Most local art supply shops will have colored paper.
Consider the angle and composition: Think about the angle and composition of your shot. Try different angles, and experiment with different compositions to find the one that works best for your product.
Use a macro lens: A macro lens is great for product photography, as it allows you to get up close and capture fine details. If you don’t have a macro lens, you can use a close-up filter or extension tube. B&H or Adorama have many to choose from.
Edit your images: Once you’ve taken your photos, edit them to enhance the colors, contrast, and brightness. You can use photo editing software such as Capture One, Adobe Photoshop or Lightroom, or free online tools like Pixlr or Canva.
By following these tips, you can create professional-looking product photography images that showcase your products in the best possible light. Contact me if you have any questions at: info@mmoorephotos.com
